WARNING: THE INFORMATION IN THIS POST, THOUGH AWESOME IT MAY BE, IS NOT INTENDED FOR THE FAINT OF HEART!
Actually, using development builds of WordPress is not exactly as scary as my warning message may have made it sound – but it’s important to understand these are development builds and while they do give you a preview into the future of WordPress, it’s not necessarily a wise idea to use these on mission critical WordPress installs.
However, if you are interested in seeing all the new changes of WordPress, or are willing to test out the latest and greatest WordPress has to offer on a personal blog, then this post is exactly what you need!
It’s not exactly widely advertised, but WordPress has developed a one click plugin to automatically update your blog to the latest development releases every night. It makes the process so easy just about anyone could figure it out – especially with a little help! (wink wink, nudge nudge)
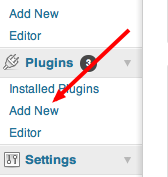
The first thing you’ll want to do is visit your WordPress Dashboard, navigate to the left side of the screen and find the Plugins section. Once there, select Add New:
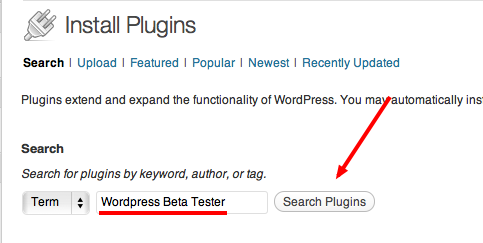
You will be taken to the Install Plugins screen. Locate the Search section and type WordPress Beta Tester as shown below:
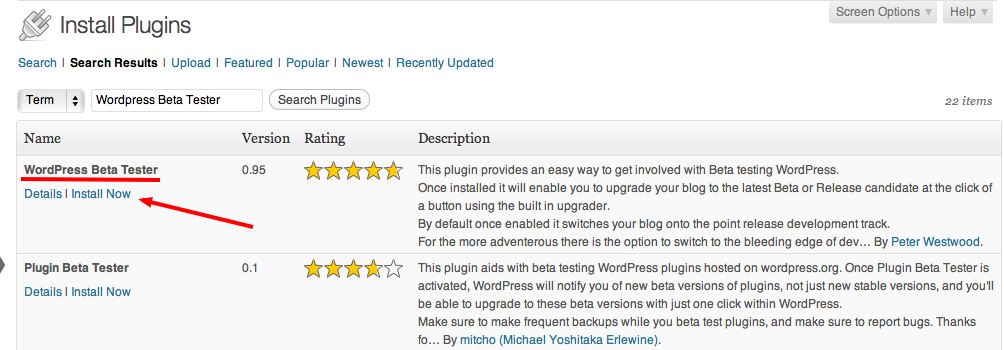
Select Search Plugins to search the WordPress plugin Database. With such a specific search, you should find the correct plugin called WordPress Beta Tester as the first option to install. Once found, select Install Now as shown below:
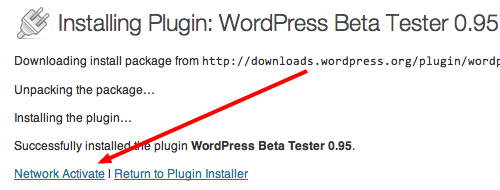
After giving WordPress the green light on installing the plugin, you will be taken to a progress screen, much like the image shown below. Once given the option to Activate the plugin, select it.
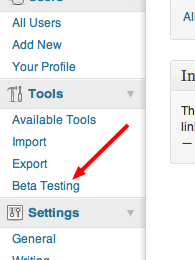
 Once activated, return to the left side of your WordPress Dashboard and locate the Tools section. Now that the plugin has been installed and activated, there will be an option which reads Beta Testing. Select it:
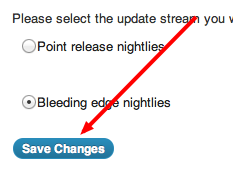
Upon entering the Beta Testing option screen, WordPress presents you with two options:
- Point Release Nightly – Some new features, but fairly stable. (Semi-Safe)
- Bleeding Edge Nightly – All new features, but occasionally unstable. (Semi-Risky)


