A few weeks ago, I wrote a post on how to edit Google Chrome so all of your Google searches were automatically encrypted and secured using Google’s SSL service. Realizing that much of the world still uses Firefox as their everyday browser, I have decided to write up a quick tutorial on bringing Google SSL Firefox.
Unfortunately, this method requires you to install an add-on (uses a little more RAM) as Firefox doesn’t have as easy a way as Chrome does to actually modify the search settings.
To install Google SSL Firefox, simply click here and select the giant Add to Firefox button as shown below:
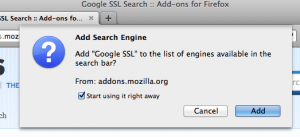
Once you select Add to Firefox, you’ll see a popup asking if you are sure you want to do this. On that popup you should notice a box asking if you’d like to Start using it right away, as I have shown below:
 Be sure to check the Start using it right away option and then proceed to select Add.
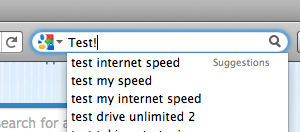
Immediately after selecting Add, your SSL search is installed – time to give it a test run. Locate the searchbar in the top right corner of your Firefox window and type Test as shown below:
Hit enter to proceed with the search and take a look to the left of the Google window. You should see a small lock that says SSL next to the Google logo.
If this is correct, you’ve successfully secured your searches using Google SSL In Firefox!
Update Regarding Google SSL Firefox —
Google now enables Google SSL Firefox by default as long as you are logged into your Google account (Gmail, YouTube, or any other Google Service.) This isn’t exclusive to Google SSL Firefox either, this is true of all browsers from Internet Explorer to Opera!
Let us know about your experience with Google SSL Firefox in the comments!


