Everyone knows using an unprotected wireless connection can be very dangerous. This is because a wireless router functions in a hub fashion; meaning it all gets wrapped together and sent in the open before it reaches its destination. This is different from a wired connection because it’s a basic point A to point B setup – no room for information leak. The answer to this problem is using encryption. If your router has a password on it, chances are it’s got some level of encryption these days, which is good! This means you are safe to use the network without the fear of someone snooping on your data.
Sadly, there comes a time in everyone’s life where they have to use an unprotected network to send an important email or hand in a project by a deadline. This is where the use of https/ssl on the website’s end can really save you. When you are using SSL, the website is putting a level of encryption on your data for you; so even if your network is unprotected, anything from an SSL enabled domain can’t be read by anyone else – even your ISP!
Google has supported SSL for a long time but not a lot of people know about it, and they have not yet made it the default way of searching as it can sometimes be a tad slower (but not slow enough that anyone would really notice.) So, if you have the knowledge to enable SSL, it’s best you do it sooner than later.
If you are using Google Chrome, you can secure all your searches done via the “Omnibar” by following this simple tutorial:
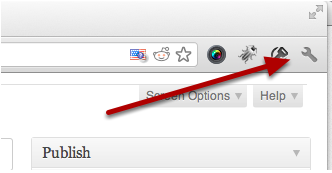
First locate the Wrench in the top right corner of your Google Chrome window:
Once in the settings screen select Manage Search Engines:
 Once in the Manage Search Engines screen scroll down till you find an empty area for you to add a new engine. It will look similar to the image shown below:
 Fill out the information as follows:
- Add a new search engine —– Encrypted Google
- Keyword —– Encrypted Google
- URL with %s in place of query —– https://encrypted.google.com/#q=%s


